Sunday, September 26, 2010

Bathroom and Bedroom Continued

Ok, when last I posted, I had said I was going to paint the bedroom on Friday. Well...I didn't. Instead I ended up priming the ceiling, and then got some boxes to start packing, since I have to be moved into the house by Thursday of this coming week. Saturday, I spent the day getting some stuff moved over (but still have quite a bit that needs to go). However, today (Sunday) - some really good stuff happened!

But to back up a bit, not only did I pack on Friday evening, I also went to an auction. I have a booth at Marketplace Antiques here in Hattiesburg (which I've not visited since Sept. 4 of this month due to the renovations), and the owner of Marketplace has recently begun having auctions every other Friday evening. So, of course I went to that auction this past Friday night. There has been a sofa sitting in the building that I've liked a lot each time I've seen it, but I hadn't gotten around to asking about it. Well, this past week, a matching chair was added to the set. I really liked the set, so when the point of the auction came along where people point out or bring up stuff they want to bid on, I asked the owner what the minimum he would take for the set would be. He said $150, which wasn't a bad price, but I wasn't sure I really wanted to pay that much. I thought it over, then asked if he'd take $130 (now this is as an opening bid on the set, not necessarily the "final price"). He told me I drove a hard bargain, but that yes, he'd take that. So, when the auction resumed and he got to that item, my opening bid was accepted and no one bid against me - so I got it for $130. It wasn't until I took the chair home that night that I discovered one of the back legs on the chair was broken, but it should be easy to fix once I get the time.

 The picture below is a closeup of the ball and claw feet the set has.
So Saturday, I gathered a group of some strong friends to help me move most of the larger, heavier pieces of furniture to the house.

Then along came today, the day my friend and I had set to lay the tile in the bathroom. I'd bought the tile on Wednesday:
It's a beautiful marble design on ceramic tile (I thought porcelain at first, but I think the box actually says ceramic). So today, we mixed the thin-set, got ready to tile - and then my friend told me it was really a one-person operation, so I should go find something else to do lol. I kind of wanted the experience of laying the tile, but I also could understand the fact the bathroom is small, and there really wasn't a lot for 2 people to do. So, while he laid the tile, I went into the bedroom and started painting the ceiling. It took a while, since I frequently had to stop to go get something he needed, or at one point had to drive to Marvin's to pick up a new paint roller (the cheap one I had gotten broke) and to get a new mixer for the thin-set (the one I had was too large for the electric drill my friend had, and his cordless one's batteries are evidently not working right). The first batch we made up was stirred by hand. I do not recommend mixing thin-set by hand. It will put your arm out of commission!

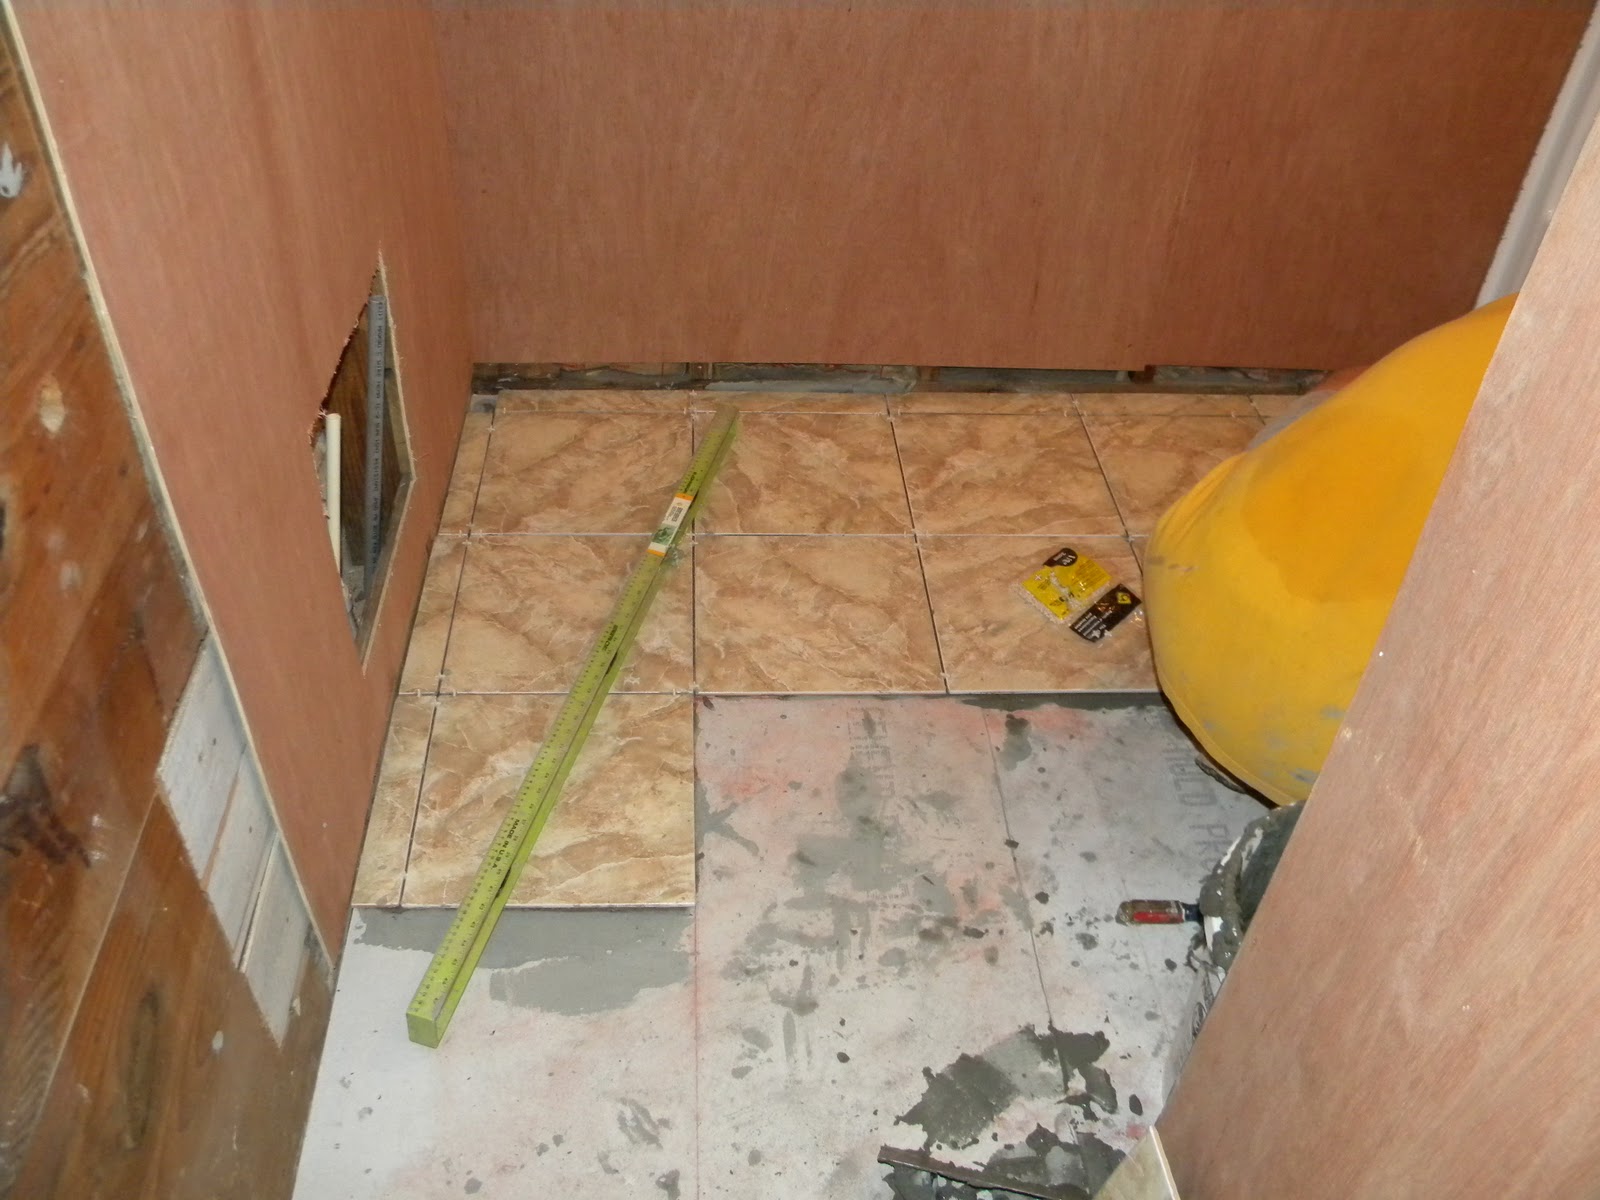
So, while he's laying tile:
I'm busy painting my ceiling, and doing a darn good job on it, I thought:
So it actually worked out rather well. The tile got laid:
And the bedroom slowly got painted. By the time I had completed the ceiling and one wall:

He had finished the tile job:

And he did a beautiful job of it! All that's left now is the grout, then the sealer, and then to drill the hole to move the tub drain, put in the toilet and connect the plumbing, and the bathroom is all set!

Thursday, September 23, 2010

Bathroom Tile and Bedroom Fun

Well, yesterday, I bought tile (which I've yet to photograph to put in this blog!). Ended up going with a type of porcelain tile that has the look of marble (rather than actually going with marble). The colors in it is in the neutral range, with greys, browns, beiges, etc. I really need to get some pics of it! The grout I chose to go with it is a shade called bone, but is kind of a dark beige, which picks up some of the colors in the tile. Unfortunately, the guy that was supposed to lay my tile for me won't be able to until the end of next week (which is far, far too late!), so my friend and I are going to give it shot on Sunday ourselves. He's at least laid tile before, so he has a good idea of what we need to do. Most likely, he and I will lay the tile Sunday, then I'll grout Monday.

Today, I spent most of the morning caulking my bedroom walls. There were a lot of places where the paneling didn't quite meet correctly, or where holes needed filling, and such. I've never really caulked before, but I got the hang of it pretty quickly. It's actually kind of soothing and relaxing to caulk. Makes you feel good filling in holes and dips and smoothing them out so that when you paint, you don't see all of that. Or hopefully you don't, anyway! I made sure to choose a caulk that was latex, with silicone additives, that is paintable, and that dries relatively fast (40 minutes). I'd no idea just how many types of caulk there are! If nothing else, this renovation has been an education in and of itself!

After caulking in the morning, I went by Home Depot to get more caulk (I'd only bought one tube last night and had run out), and discovered a khaki shade of paint by Behr called Peanut Butter. I checked out the chip card, then decided I'd get a sample and try it. There was a slight mixup with the guy filling in at the paint desk; I told him "sample" and he heard "gallon". So when he labeled and handed me the gallon, I commented that was an awfully big sample. When he realized what I wanted, he mixed up a sample real quick and I took it out to the house and tried it.
The Peanut Butter trim looks LOTS better than the Tomato Bisque (even though I still like the Bisque hehe). So, I decided that's what I'm going to go with. I found myself at Home Depot tonight to get an extension pole for my paint roller, and discovered the gallon of Peanut Butter on the "Oops" table for $5, so I went ahead and grabbed it. I think I may even paint my ceiling fan blades that color.

Once I tried out the Peanut Butter, I then went about getting the ceiling ready to apply the Killz to it so I could paint the acoustic tiles. I figured I'd leave them in place, for insulation, and just paint over them. However, first I had to fix a "sag" in one section of the ceiling. I had bought some long roofing nails just for this purpose; other nails I had tried tore right through the tiles and didn't correct the sag at all, but these nails were just the ticket. Long enough to grip the clapboards that make up the ceiling under the tiles, and with a wide enough head to hold, without puncturing, the tiles, they did the trick. Once that was done, I then swept off the tiles and tried removing the AC vent from the ceiling. However, when the bathroom was built (or perhaps rebuilt), they placed one of the walls directly under part of the vent - so the vent is wedged in place by 2x4's. So, I couldn't remove that. Then, there were 3 water stains in the tiles. I had to apply the Killz 4 times to hide those stains, but at least when I paint over the Killz, the stains won't show through. I didn't finish Killzing the ceiling, though, since it was starting to get late and I needed an extension pole for the roller.

All in all, a productive day. Tomorrow I plan to finish Killzing the ceiling, then paint it once it dries, and then paint the walls and trim. Hopefully it'll all come together!

Tuesday, September 21, 2010

Walls - Bedroom and Bathroom

Today, I ended up focusing a bit on walls. Specifically, I got tired of seeing those ugly, dingy white walls in my bedroom, and decided to take a step towards doing something about it. I took a paint color card from Lowe's to Home Depot today (because Lowe's had one person working the paint desk and 7 people in line waiting), got them to color match the Historic La Fonda Copper I wanted to try for the walls and the Tomato Bisque I wanted to try for the trim. The results aren't bad, although my friend hated the trim color (he liked the copper, however). I'm trying to decide if I want to go ahead and paint the room those colors, or if I want to try other samples. I initially didn't have these pumpkin-esque colors in mind at all when I arrived at Lowe's today, but I spotted them on a card, considered the implications, and decided it can't hurt to give it a try. I've been given subtle suggestions that white would be a good trim for the copper, or perhaps a beige or khaki shade. Not sure yet, but I'd love to get the bedroom painted before I move in next week!
One thing that took quite a while today - the better part of an hour or more, actually - was removing the curtain rods from the bedroom windows. They were screwed in place with VERY long screws! The bedroom walls are built like some of the bathroom walls - clapboard make up the walls, and then paneling was added over that. You can see in the picture above the small rectangle showing the original paneling, before it was painted over. That rectangle came from the mounted wall lamps that once shown light on either side of the previous owners' bed. I hated them and took them down today as well.

I'm so ready to get the tile, vanity, and toilet in place in the bathroom as well! Still need to drill the hole for the shower drain, but things are getting closer. Hopefully Maverick (the cat that adopted me) will lose his passion for sleeping in the sink once it's installed:
The bottom of the vanity is very pretty, and matches the ceiling:
It's going to look awesome when it's installed, and when the cabinet I'm planning to build or buy (I've swung around to thinking building it would be better) is put in place next to it. I think my bathroom's going to be my favorite place to be!

Today, my friend helped me hang some of the walls as well. I'm using luaun for the walls, which are pretty in and of themselves, but which I plan to paint when they're up and I've chosen a color scheme for them.
Getting the luaun around the bath/shower unit wasn't easy. Especially since, as everyone knows by now, this house, like most old houses, is NOT square in the least. That wasn't nearly as much fun, however, using the jig saw to cut out around the plumbing for the vanity!
That square hole will be covered with a small sheet of luaun, then of course the vanity itself will hide both the hole and the cover, so it won't be obvious at all that anything was there. And that's another long, but exciting, day of renovating!

Monday, September 20, 2010

Plumbed!

And another step towards bathroom completion has been taken! It took, literally, ALL DAY yesterday, but we got the holes drilled, the plumbing under the house attached and poking up through the holes into the bathroom! Only thing not done was the drain for the bathtub, but that won't take too long. Worst thing about that will be moving the drain pipe (the tub was a left-handed drain but the faucet and shower were on the right-hand side - so I replaced the tub with a right-handed one so the drain and faucet will be on the same side of the tub). Not only did the plumbing get done, but the exhaust vent is in the ceiling and...there actually IS a ceiling!
This is the ceiling in the little bathroom hallway.
These are views of the main bathroom ceiling, including a view of the exhaust fan. It's wired, but not connected, as yet, and we're trying to decide if it's going to be wired with the light (and come on every time the light does), or if it's going to be on a seperate switch. The light in the image is the light that originally came with the bathroom, but is not the light that's going to remain. I'm thinking track lighting, something that will follow the length of the ceiling so at least one light will be aimed at the currently-dark hallway.
Here, the cat that adopted me, Maverick, is checking out the plumbing coming up through the wall for the vanity. The original vanity sat at a 90 degree angle to this wall, but my friend and I think having it along this wall will help with the tight quarters in the bathroom (which the main part of the room is only 5' x 8', and then a 48" x 32" hallway).
This would be the pipe for the water coming into the toilet. The toilet drain is just below the bottom edge of this picture. It's smelly, so I keep it plugged up with an old shirt from my former job. It fits in many ways. :)
These are the hot and cold water pipes for the bathtub/shower. The grey one is the cold water, and the white is the hot (I didn't think to label those in the picture for the vanity pipes).
Just another view of the ceiling, this part over the tub/shower unit, also showing the hot water pipe reaching into my bedroom ceiling. I'll be so glad when the bathroom is finished, I have to be out of my apartment and into this house in 10 days!

I also ripped out the carpet in my bedroom today. The hardwood under the pad doesn't look bad at all, except near the bathroom wall where we had to replace several of the rotted boards. There seems to be a bit of weakness in the floorboards in the corner of my room near where the rotten boards lie in the kitchen, but all in all, not bad.
The above pic is a view of my bedroom floor, after the carpet and padding were removed. The floor was painted brown at some point, but doesn't look too bad.
The upper right corner is next to the rotted kitchen boards. There's a little bit of weakness there (a couple of the boards sag and creak when stepped on), but all in all, I think it's safe as is. The area under my tool box (and just behind it, outside the bottom of the picture) spoils the possibility of leaving bare floors. There's also the fact the bare floors would probably be very cold to my bare feet on cold winter mornings when I get out of bed, so I will probably put my biases against carpets aside and go ahead and carpet this room after all.
Maverick decided he was quite pleased with the bare floor concept and stretched out to show his appreciation. He tends to make it difficult, if not almost impossible, to get a lot done around the house, but he certainly makes the time pass more pleasantly!

Sunday, September 19, 2010

The door and me

For several weeks, I've been eyeing a beautiful antique door at Yesteryear Antiques and More, run by Gina (funny, I have several items with her on consignment and I don't even know her last name!), which I've been wanting to use as my front door. My friend has insisted that I shouldn't use it for an outside door, as it's mostly glass and thus isn't very secure. So, when we removed the door and jamb from my room to fit the tub/shower unit through it to put in the bathroom, I figured since the door jamb was already down, this might be a good place to use the door (the door is wider than the door that was already in place, but since I have to rebuild the jamb anyway, and the space is wide enough, why not?). Now, some might question the concept of using a mostly-glass door for a bedroom, but why not? It's mostly frosted glass, and it's not like anyone's going to be spying on me through that door. :)

The picture above is the door as it looked in the antique shop. Dingy, dirty, and desperately in need of some TLC, I saw the potential in it, even when others did not. I finally got the door Friday (it cost me $50 - double what my sister thought I should spend on it, but half of what my friend figured it would cost), brought it home, did some emergency nailing to the trim work to make sure the glass panes stayed in their frames, and then cleaned the glass. I've yet to strip the paint from it, but here's how it looks after my minimal TLC:
See how nicely it cleaned up? The next picture is a closeup of  the upper middle pane:
And then two views of one of the upper end panes:
And then a closeup of the three middle panes:
This door is going to be gorgeous when I finish with it! I need to strip the paint from the flaky side, and either strip it from the other side as well, or just paint over it. I'm thinking a red mahogany would make this door come alive!

Bathroom tub and shower

Since I had planned to replace the old, worn-out porcelain-over-cast-iron tub that came with the house, I did some shopping around and found a unit that I loved. It was a one-piece fiberglass 60" shower stall complete with glass doors. I had decided not to bother installing an actual bathtub, since I prefer showers anyway and decided the extra space (the shower unit is 36" deep, while the tub units tend to be 32" deep) would be optimal. The price tag on it was a hefty $649, but I figured it was worth it. Well, as I was preparing to purchase it from Marvin's Building Supply, the guy helping us mentioned that he had a tub/shower unit sitting outside that a lady in Meridian had purchased, but she'd found a "spot" on it and they had to drive to Meridian to pick it up for a return. Since it was a return, they couldn't sell it for the retail price and it had a substantial discount to it. We went outside to check it out, and all of us searched for this "spot" the lady had complained about. The "spot" turned out to be some dirt that easily rubbed off. Now, while I had wanted a shower unit, rather than a tub/shower combo, the fact the unit was being offered to me for $100 won me over! This particular unit retails at Marvin's for $289, so this was a substantial savings. Granted, it didn't come with the shower doors, but I purchased those for $165, making the grand total for this set $265 as opposed to the $649 I was orginally going to spend. (I later took back those shower doors for some I found at Lowe's that were much prettier and only $15 more.)
In the picture above, we see the $100 tub/shower unit sitting in my kitchen. I didn't take pictures of the fun and excitement we had of loading it up into the back of my friend's truck, strapping it down, and finding room for the shower doors and the vanity, nor of when we got it back to the house and had to unload it, carry it up the back steps, and maneuver it into the kitchen. But rest assured, it would have made a good "Funniest Home Videos" clip.

Upon getting it into the house, we decided the only way to get it to the bathroom was to take it through my room and through the opening in the wall that conveniently is still in place. However, one problem immediately presented itself: My bedroom door wasn't wide enough. We started by taking the door itself off, but there still wasn't enough room, so we ended up having to remove the jamb as well.
Of course, once the jamb was down, that started giving me ideas about the bedroom door. But that's a topic for another post. :) Anyway, so now we have the door and door jamb off of my bedroom, and we managed to get the unit through there and into place in the bathroom:
And it's a good thing we did NOT get the bigger shower unit - it never would have fit through the doorway even with the jamb gone! But I'm happy with the purchase I made, and thrilled that it's in place, just awaiting the plumbing components now. These are the shower doors I originally bought to go with the unit:

They're very pretty, with a rain-drop pattern on the glass. But the doors I fell in love with at Lowe's are, to me at least, so much prettier! Here they are:
Notice the intricacy of the etched leaves? Very, very nice! Of course, before I returned the doors to Marvin's (which I insisted on doing before I purchased the doors from Lowe's), I made sure Lowe's had some in stock! And then I had forgotten to check the size, so I had to call Lowe's to get someone to check on that. Once that was done, I returned the raindrop doors to Marvin's, then went over and got these, and now they're all set and awaiting installation!

Kitchen demolition

With the bathroom awaiting completion, I began working on the kitchen. The first thing I did was to remove the vinyl tiles that layered the floor.
At some point, plywood had been nailed over the hardwood floor, but not uniformly. There was a big, cut curve extending from the sink over to the right side of the living room door (right side if you're facing that door while in the kitchen).
Some sort of pink chalky drywall or mortar had been used to fill in the cuts in the hardwood floor when the plywood was removed. I've no idea why the plywood was removed like that. Of course, until I made it to the section of plywood just beyond where you can see the shop vac, I had no idea why the plywood was even put down in the first place. Seemed like it was such a waste, hiding that beautiful hardwood floor like that.
You'll also notice the plywood was placed direction on top of the original linoleum. There were actually three layers of linoleum/vinyl on this foor: That green original layer, a layer on top of the plywood, and then the vinyl tiles placed on top of that layer.

While in the process of removing the plywood, I also removed the doors from the base cabinets.
My original plan was to replace the base cabinets but reuse the wall cabinets. After checking out the base cabinets a bit more closely, I've decided I can salvage them and save the expense of new cabinetry.

Back to the floor, I continued peeling (and that's exactly what it was like - peeling layer after layer off each sheet of plywood, which mostly refused to come off solidly) the plywood from the floor to expose the underlying hardwood. I discovered some areas that were slightly rotted:
That section is in front of the water heater closet. It's not really bad off, just discolored, with perhaps a crumbly bit of wood here and there. The main problem area is in the far corner of the kitchen, the corner tucked between the laundry room and my bedroom, where the washer and dryer were originally located, seen in the following pictures as the sheet of plywood covered with debris:
This floor took a couple of days to finish. When I finally removed the last sheet of plywood, I ended up having to remove quite a few rotted floorboards as well:
 Those pictures are a little out of date, as I've removed more boards in the meantime. I've yet to replace them (and I'll be replacing them with a sheet of treated plywood) because the kitchen floor is a little shaky. To correct that, I've purchased a 16 foot long 6x6 beam and two support jacks, along with the concrete foundations for them, and we're going to use this "natural" opening to get under the kitchen floor to put that beam in place. Once it's positioned, then I'll put the plywood in place and get that hole sealed up. After that, it'll be a matter of putting down backerboard and tiling the kitchen. The kitchen tile will match the bathroom tile (once I've picked that out!), so it'll be a continuous flow from the kitchen to the bathroom and vice-versa.